WIP 05-24-2014
Posted: Sat Oct 08, 2022 9:49 pm
The long holiday weekend means more bench time than usual and I'm taking full advantage of it! Of course it's more than a three-day weekend, this is also a chance to remember those who have given the ultimate in service to their country and I'd be remiss without acknowledging that and also extending my respect and admiration for all our men and women who serve in uniform.
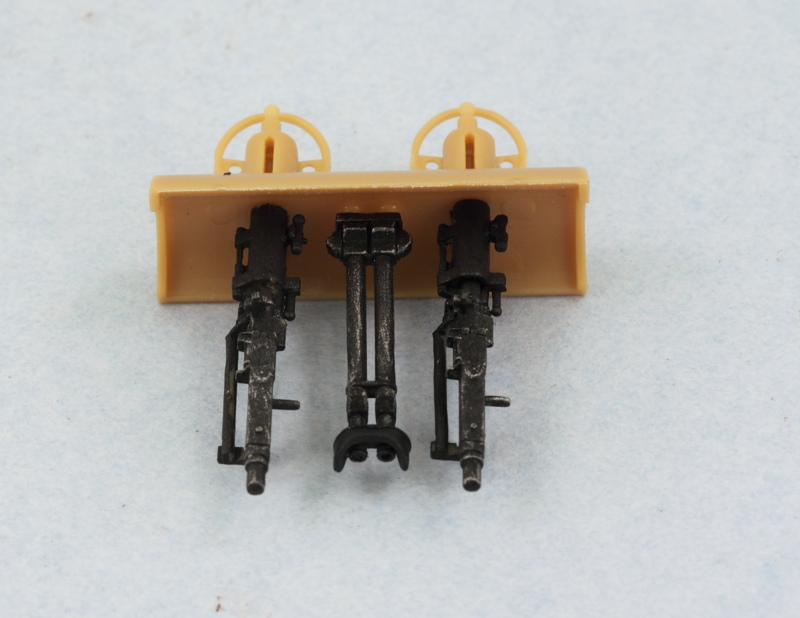
The last remaining detail on my pocket Tiger is the turret. Earlier I'd mentioned that I was deviating a little bit from the Bronco instructions in terms of the assembly order and I elected to detail and install the twin MGs and sights into the mantlet first and then add the ammo bags after it was in place. This provide to be a good call as it made it much easier to detail them and install them properly into the mantlet while doing test fits along the way to make sure everything played nice with the rest of the turret interior. The MGs were detailed with Testors Model Master non-buffing Metalizer Gunmetal and then lightly dry-brushed with enamel Steel for their finish.
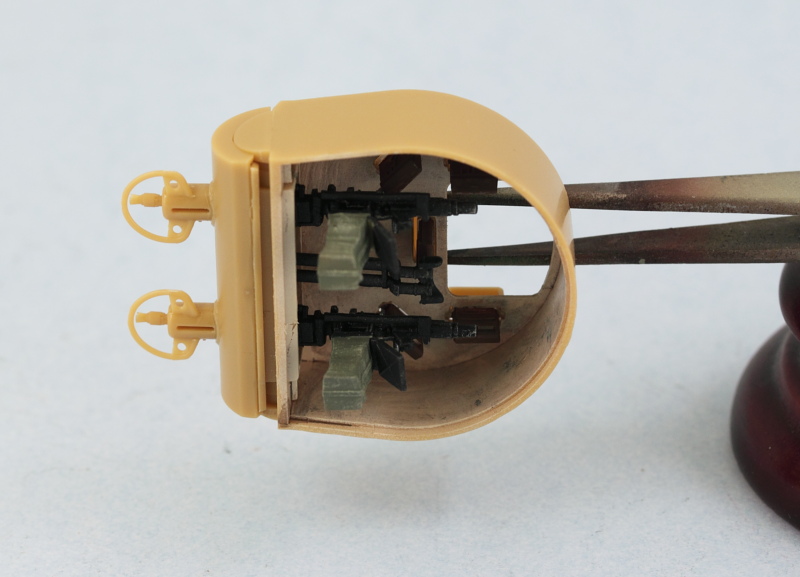
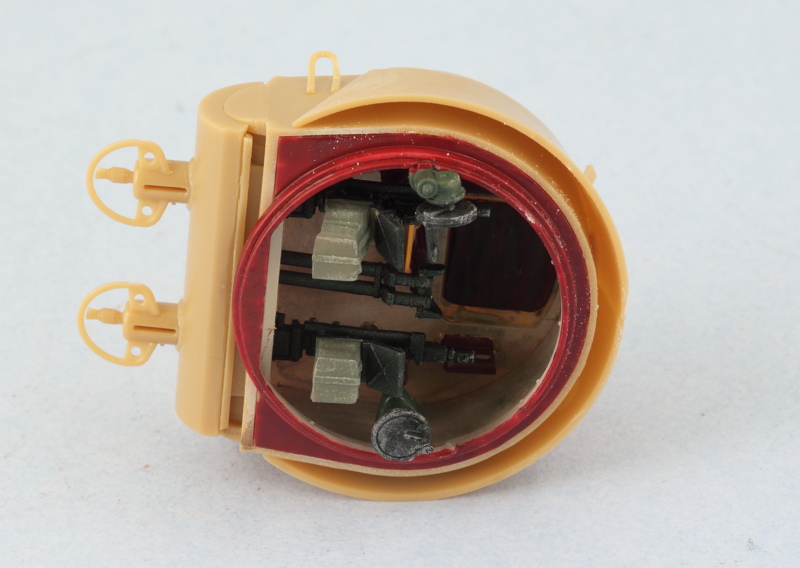
Here's the bottom up view of the turret after the mantlet was installed and the ammo bags added. I also need point out an instruction diagram-induced error that you can see in this pic. Notice that slight gap at the bottom of the mantlet? Turns out way back when I installed the rear part of the mantlet, part D44, into the turret, I used the instruction diagram as a guide and it shows the larger part of the piece on the bottom with the thinner piece on top. Problem is that the external mantlet is designed to fit that part the other way around...and the MG barrel sleeves are keyed as are the MG mounts on the inside to specific alignments...which will result in everything being upside down. Not a good thing...and once I realized the problem, it was no good trying to get the mounts out and flip it around...so I had to trim the part instead to allow it to fit correctly and remove the 'extra' that hung over the bottom...and produced that slight gap. Once painted it will look fine and of course will only be visible if the turret is off and flipped over...but a word of caution to anyone coming along behind!
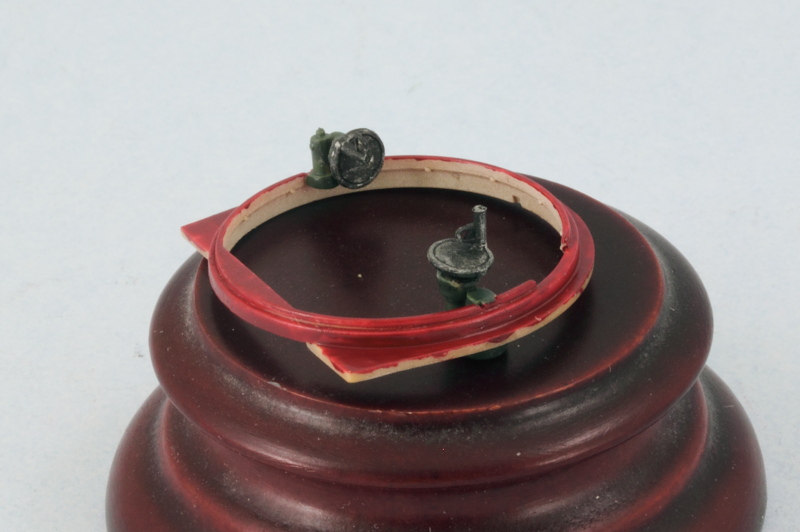
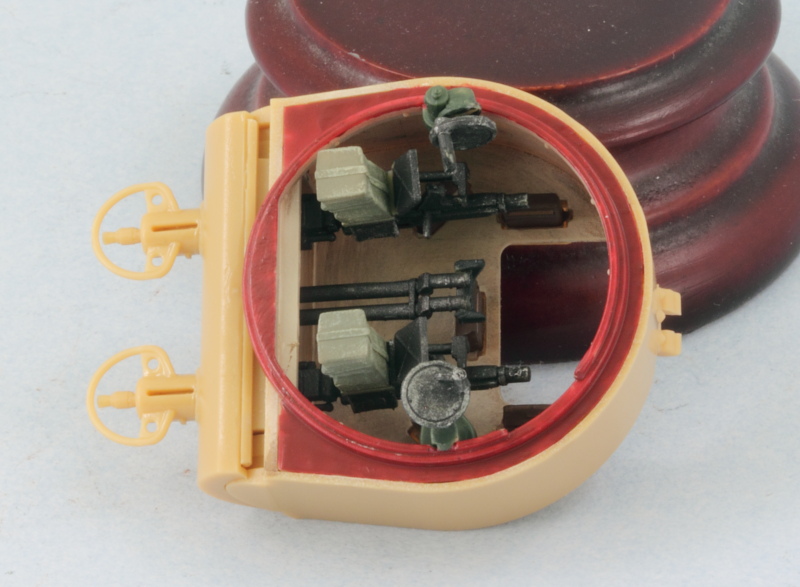
The base of the turret came next. The elevation and traverse wheels and gears were assembled and installed...they are delicate multi-part assemblies and were actually done last weekend and left off to the side to fully dry before handling. They were detailed and installed and the underside given a dose of red-oxide primer. After the paint was dry, the turret floor was installed in place.
Moving back topside on the turret, I detailed the commander's hatch using a 50/50 mix of Light Gray/Panzer Dunkelgelb so it will match what eventually will be the vehicle's exterior color and detailed the head pad. Bronco designed the hatch to remain workable and relies on a tight friction fit on the hinge to achieve this. A small note, the hatch stops on the edge of the turret swiveled on the real vehicle but Bronco has you position them in the 'open' stance, so a word to the wise if you decide to pose your hatch closed. Mine will be left open on the final display but will be kept closed during painting to help protect the interior.
The add-on armor for the turret was also installed along with the lifting eyes to round things out.
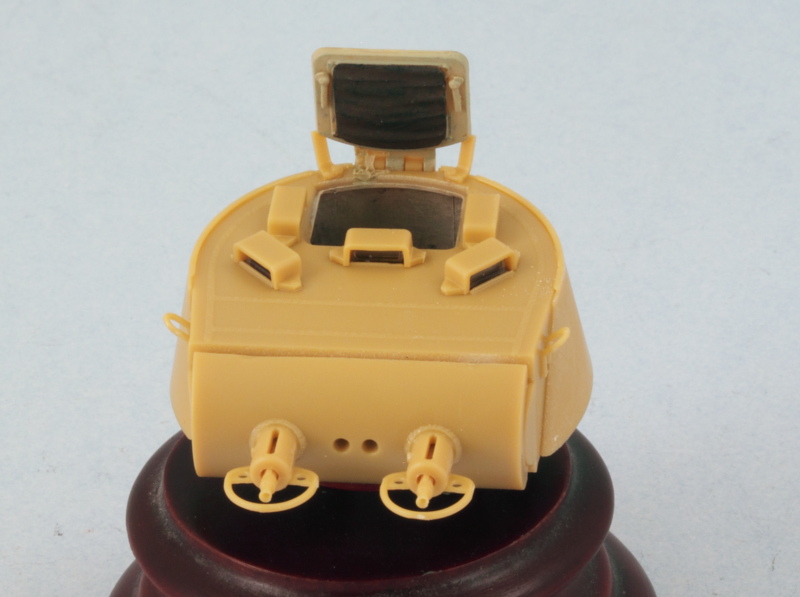
The key to the add-on armor is that it only touches the actual turret at the top edges and where the angled front pieces meet the turret sides. Be careful with the fit at the back, reference photos showed this was smooth so after the glue set, I did some light sanding to remove the join line that is inevitable.
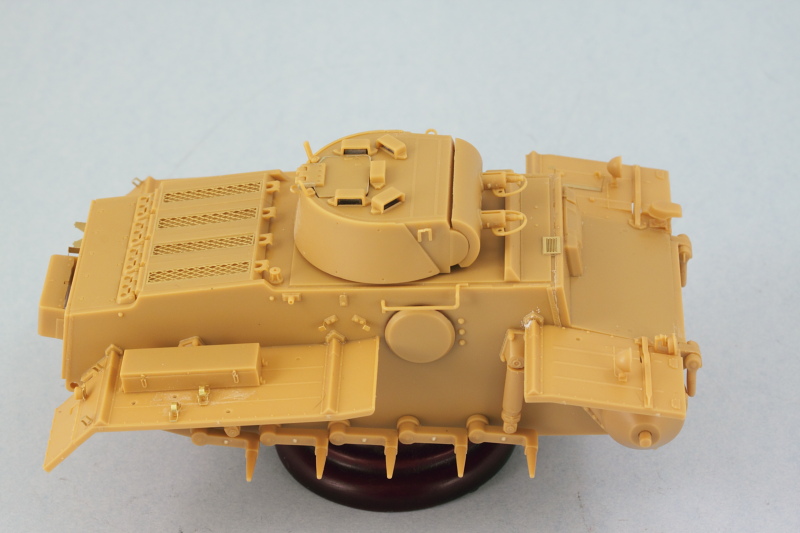
A quick test fit shows the turret sits properly in the hull and can be easily removed for painting and detailing...just have to remember that the commander's chair supports stick up slightly so you have to use the turret ring to push that forward slightly when you go to add the turret in place. The turret will rotate but not 360 degrees obviously because of interference with other detail items in the turret hull and the fact that the commander's chair itself doesn't rotate with the turret, so don't try to do too much here or you may knock something loose in the process!
Next up will be getting everything ready for paint!
The last remaining detail on my pocket Tiger is the turret. Earlier I'd mentioned that I was deviating a little bit from the Bronco instructions in terms of the assembly order and I elected to detail and install the twin MGs and sights into the mantlet first and then add the ammo bags after it was in place. This provide to be a good call as it made it much easier to detail them and install them properly into the mantlet while doing test fits along the way to make sure everything played nice with the rest of the turret interior. The MGs were detailed with Testors Model Master non-buffing Metalizer Gunmetal and then lightly dry-brushed with enamel Steel for their finish.
Here's the bottom up view of the turret after the mantlet was installed and the ammo bags added. I also need point out an instruction diagram-induced error that you can see in this pic. Notice that slight gap at the bottom of the mantlet? Turns out way back when I installed the rear part of the mantlet, part D44, into the turret, I used the instruction diagram as a guide and it shows the larger part of the piece on the bottom with the thinner piece on top. Problem is that the external mantlet is designed to fit that part the other way around...and the MG barrel sleeves are keyed as are the MG mounts on the inside to specific alignments...which will result in everything being upside down. Not a good thing...and once I realized the problem, it was no good trying to get the mounts out and flip it around...so I had to trim the part instead to allow it to fit correctly and remove the 'extra' that hung over the bottom...and produced that slight gap. Once painted it will look fine and of course will only be visible if the turret is off and flipped over...but a word of caution to anyone coming along behind!
The base of the turret came next. The elevation and traverse wheels and gears were assembled and installed...they are delicate multi-part assemblies and were actually done last weekend and left off to the side to fully dry before handling. They were detailed and installed and the underside given a dose of red-oxide primer. After the paint was dry, the turret floor was installed in place.
Moving back topside on the turret, I detailed the commander's hatch using a 50/50 mix of Light Gray/Panzer Dunkelgelb so it will match what eventually will be the vehicle's exterior color and detailed the head pad. Bronco designed the hatch to remain workable and relies on a tight friction fit on the hinge to achieve this. A small note, the hatch stops on the edge of the turret swiveled on the real vehicle but Bronco has you position them in the 'open' stance, so a word to the wise if you decide to pose your hatch closed.
The add-on armor for the turret was also installed along with the lifting eyes to round things out.
The key to the add-on armor is that it only touches the actual turret at the top edges and where the angled front pieces meet the turret sides. Be careful with the fit at the back, reference photos showed this was smooth so after the glue set, I did some light sanding to remove the join line that is inevitable.
A quick test fit shows the turret sits properly in the hull and can be easily removed for painting and detailing...just have to remember that the commander's chair supports stick up slightly so you have to use the turret ring to push that forward slightly when you go to add the turret in place. The turret will rotate but not 360 degrees obviously because of interference with other detail items in the turret hull and the fact that the commander's chair itself doesn't rotate with the turret, so don't try to do too much here or you may knock something loose in the process!
Next up will be getting everything ready for paint!