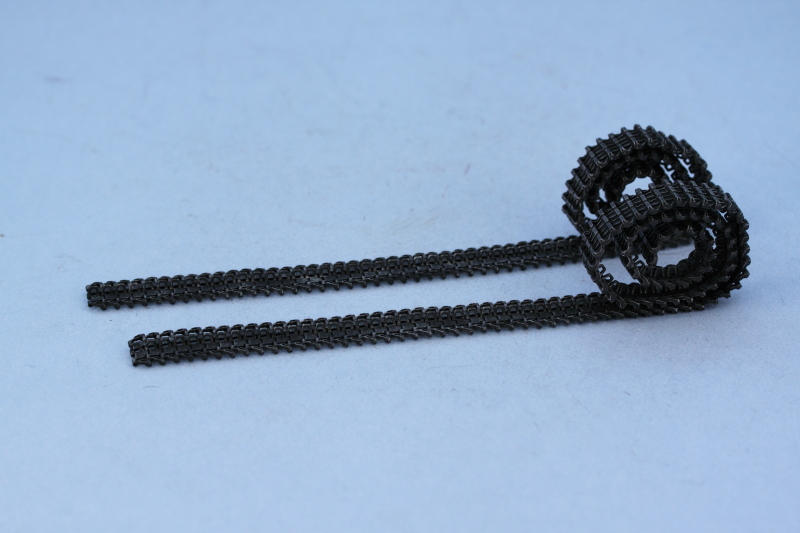
I had hoped to get to the painting stage today but two things tripped me up. The first was simply an underestimation of just how many parts I still needed to clean-up and add to the vehicle and the second was the realization that I didn't have all the paint supplies I needed on hand in sufficient quantities! So that means painting the exterior will be delayed until tomorrow but will still get done this weekend.
Speaking of all those parts to add, I went back through the different steps and conducted a survey to be sure I didn't miss anything. I test fit the kit-provided Magic links with the spare track holder on the hull nose and the links can slide in and out without problem so I went ahead and installed B3 from way back in Step 4. I also returned to Step 18 and added the lifting eyes, parts A4, to the rear exterior but left off the cleaning rods until after paint. All of the details in Step 21 were also installed, this covered the crew hatches, all the various lifting eyes on the hull glacis, and also the lifting eyes for the fighting compartment side panels. The mount holes for the A20 eyes was larger then the eye itself so a little but of putty was needed to fill those gaps.
After checking references, I realized that the three lower eyes called for in the instructions aren't seen on the actual vehicles...both the surviving examples in Kubinka/Aberdeen and numerous in-action photos don't show these as being there so I filled their small mount holes with putty and left them off.
I also completed the details in Step 22 which deals with the Bosch light and the jack. I assembled the jack but left it off for now to make it easier to paint that area of the fender and the hull. The instructions have an error here in that they call for the base of the Bosch light as part B40 but you actually need to use B39 or the actual Bosch light will install backwards. I drilled out the armored connection point on the glacis as well as the port on the Bosch base with a #72 finger drill and added the connecting wire conduit with 0.5mm diameter solder.
Step 24 was the last one I needed to work on and it deals with the gun travel lock. The instruction show this already assembled which makes things a bit tricky as there are no less than 8 parts that go into the assembly and some of them are very small. I used a #78 finger drill to carefully drill out the small pulley that is part M23 to allow me to add the missing tension cable that allowed the gun travel lock to be disengaged by the gunner from the relative safety of the fighting compartment vs. crawling out onto the glacis to do it. I drilled this hole while M23 was still on the sprue since it is a very tiny part. The travel lock was assembled and I was careful with the base parts to allow the lock to remain workable. This will help not only in the painting process but also provides options in the final display between the gun being secured or not.
The tension cable was added using waxed 0.008" diameter ship rigging thread which I glued in place on the glacis with small amounts of liquid glue and used regular glue to glue it into the base of the travel lock. The thread has sufficient flexibility that the lock can be moved freely without causing the thread to break free.
Now I'm off to the LHS to rectify my paint supply problem and tomorrow this one's got a date with the spray booth!
Dragon Sdkfz 164 Nashorn Premium Edition (2010)
-
- Posts: 1245
- Joined: Wed Sep 28, 2022 10:18 pm
WIP 02-21-2010
The much-anticipated time for paint had arrived so to get ready for it today I prepped the fighting compartment by masking it off with several strips of blue painter's tape. Some of the strips were cut in half and positioned in various degrees of overlap to maximize protection, especially around the gun.
The road wheels and other items for the suspension were also made ready by mounting them on wooden toothpicks. I used small amounts of blue poster tack putty to secure them in place along with my trusty styrofoam box. Since there are 36 road wheel halves, it's a crowded place!
The painting session began with the application of a primer coat of MM enamel Italian Dark Brown applied by airbrush. This allowed me to check all the putty and sanding work I'd done earlier and I made a few corrections in various spots and then touched up the primer before committing to the base coat.
The base coat was applied by airbrush using multiple thin coat passes to build it up sufficiently over the primer coat. I used a custom mix of MM enamel Light Gray and Panzer Dunkelgelb in a 50-50 mixture.
Next up was the camo pattern. I decided to apply a three tone pattern for a vehicle with the sHPzJgAbt 525 in Italy 1944 and used the kit provided finishing guide as a rough outline for the overall pattern. I applied the Rotbraun first by airbrush freehand using a 50-50 mix of MM enamel Military Brown and Leather. Then I added the Olivegrun freehand by airbrush using MM enamel Khaki. I went back over the pattern and cleaned up some over spray here and there with the original base coat color. Once I was happy with that, I heavily thinned down the base coat mix and sprayed it as a mist coat from about 12 inches distance to tie everything together. The masking was removed and it did its job well with only some very minor touch ups needed.
I also got the road wheels and other suspension items all done. They were primed just like the vehicle with Italian Dark Brown and then the rubber portions painted by airbrush using MM enamel Gunmetal. I used a draftsman's circle template to paint the hubs with the base coat mix used on the hull.
All told I spent about 5 hours working with the airbrush today and even though it was still a little windy and cold, it needed to be done so that I could move on. I didn't get the MK tracks painted, that's something I can tackle during the week since it can be done in short bursts and with a full week for the paint to cure, things are getting very close to the finish line.
-
- Posts: 1245
- Joined: Wed Sep 28, 2022 10:18 pm
WIP 02-27-2010
The old saying that the devil's in the details really holds true on this particular build. Today's efforts continued to focus on the remaining details and the time it took to address them turned out to be more than I had anticipated. The goal was to get to the weathering stages this weekend but that's not likely to happen given the cure times needed for the Future and decal stages.
Despite that, a lot did get done today. I assembled all of the road wheels and installed them to both sides of the hull, checking for a level fit, and let that set up. Then the lower hull was pre-weathered by stippling some enamel Burnt Umber with a round 0 sable brush to simulate random scratches and dings due to rocks, dirt, etc. being kicked up by the tracks. I also painted and detailed the vehicle exhausts on either side before installing the return rollers in order to have some room to work with. They were base coated with MM Non-buffing Metalizer Gunmetal and then given a light wash of Rust to create their look.
The jack block was painted and detailed by hand with the wood portions getting a base coat of a tan "wood" mixture I created a long time ago followed by a wash of thinned MM enamel Leather. Both Black and Burnt Umber artist pastels were added for some variation. I also installed the vehicle's standard antenna mount but modified it by removing the stub post with sprue cutters and drilling out the base with a #72 finger drill to allow for a brass 2m antenna to be installed later. I also detailed the release catch cable for the travel lock with non-buffing metalizer Gunmetal and lightly dry brushed the pulley wheel with Steel.
The rear hull also got some attention with the two spare road wheels added along with their mounts. The gun cleaning rods were detailed the same as the jack block with the threaded end caps detailed using MM enamel Steel. The rear blackout light was painted with Flat Sea Blue as well.
The remaining details for the fighting compartment that I'd left off for easier painting/access were added at this point as well. The instructions tell you to install 3 of the swinging MG mounts but I decided to leave the one they wanted at the rear off. I couldn't find any photographic references that supported a 3rd mount and the surviving vehicle at Aberdeen only has the two on the sides so that's what I went with. The bases are PE and I hadn't realized just how large they were otherwise I would've added them earlier in the build since it was a very tight fit to get them installed properly above the ammo bins due to the height and angle of the side walls. I added the swivel mounts and glued them in place with CA gel.
The two side wall periscopes were also detailed and installed. Since these were Bakelite and held in place with small metal frames, I painted them first with MM enamel Italian Dark Brown and then detailed the frames using the same DY mix as the vehicle base coat. For the plexiglass faces, I used enamel Steel followed by Tamiya acrylic Clear Smoke.
Last but not least, the commander's rabbit-ears scope was added. This is a tricky multi-part assembly that has two parts for the base and another 3 parts for the scope itself, so it had to be assembled in stages to allow the delicate parts to set up properly. The scope was base coated with non-buffing metalizer Gunmetal and lightly dry brushed with Steel and then given a very light black artist pastel treatment. The lens faces were treated the same as the periscopes to complete its look.
I assembled the multi-part jack and painted it a slightly different shade of DY in order to provide some visual variance relative to the rest of the vehicle. Instead of a 50-50 mix of Panzer DY/Light Gray, I used an 80/20 mix.
The hull front also received some details in the form of the spare track run. I used the kit-supplied Magic links for this and selected 14 from the baggie. Each one needed some slight cleanup to remove a small sprue nub on the guide horn and some sanding to remove two small raised ejector marks on the exposed face of each link. The links were glued together with regular glue, base coated with non-buffing metalizer Gunmetal, dry brushed with Steel, and then given a wash of Rust. Once the wash had dried, I dry brushed MM enamel Burnt Umber to round out the look and installed the run in place in the holder.
The final task of the day involved the tracks. I pre-weathered the sprockets and idlers with the same stippling approach used on the lower hull and also added some dry brushed Steel for the sprocket teeth and the contact surfaces on the idler. I added the base of the idler to the actual idler wheels and did a test fit with the MK tracks to see how many links and what position the idler could support. The track runs were extended to the recommended 104 links and the idler is capable of properly tensioning them with anywhere from no sag at all to full sag (if there is such a thing!), so I was happy with that outcome.
Tomorrow the tracks will get painted and installed and then the Future coats will be added along with the markings. At least that's the plan!
-
- Posts: 1245
- Joined: Wed Sep 28, 2022 10:18 pm
WIP 03-02-2010
I managed to get quite a bit of work done on Sunday but held off posting until I had the markings on and everything was set for the weathering process. The MK track runs were given an airbrushed primer coat of MM enamel Flat Black to protect the bare plastic from the lacquer-based base coat of Non-buffing Metalizer Gunmetal. The tracks were then dry brushed with MM enamel Steel and given an overall wash of enamel Raw Umber to round out their look.
The tracks were installed to both sides along with the sprockets and idlers. The vehicle was then set off to the side to allow everything to set up nice and solid.
The entire vehicle was sealed with a coat of Future applied by air brush. Ordinarily I would allow this to dry for about an hour or so before moving on to the decals but I ran out of time on Sunday so the coat got to sit longer than normal as a result. The decals were applied for the Italy 1944 sPzJgAbt 525 vehicle but instead of using the finishing guide for #131, I used the guide for #112 which is also included. These vehicles belonged to the same unit and would have the same insignia/markings but for some reason the finishing guide for #131 doesn't follow the same standards as that provided for #112 in terms of the numbers placement and the use of the unit insignia. Go figure. The decals were applied individually and treated with Walther's Solvaset to insure they snugged down tight. Once dry, a 2nd sealing coat of Future was applied to protect the decals during the weathering process.
-
- Posts: 1245
- Joined: Wed Sep 28, 2022 10:18 pm
WIP 03-07-2010
I wasn't feeling too motivated yesterday so skipped working on the build for the day. I've found that when I get to the weathering stages if I try to force things I usually end up with a less than desirable result and today was a much better day so some progress was made although not quite as much as I'd planned for.
The first order of business was the overall application of a wash of MM enamel Raw Umber to the exterior of the vehicle. I use about a 90/10 thinner/paint ratio and apply the wash with a round 0 sable brush.
The wash dries pretty quickly but good ventilation is key due to the large amount of thinner involved. Next was the application of dot filters using MM enamel Flat White, Panzer Dunkelgelb, Deep Yellow, Raw Sienna, and Panzer Olivgrun. I applied small dots using spotter brushes and then used a square tip brush dampened with clean thinner and repeated downward strokes to work the dots until they virtually disappear. To remove thinner from the brush, I use an ordinary paper towel and touch the brush to it several times to avoid flooding the surface I'm working on and ruining the effect.
This process was repeated in small sections over the entire vehicle and took about 3-4 hours to complete. I worked in stages, all the while wearing a paint breather mask due to the large amount of time spent with thinner.
More weathering is yet to come in the form of a pin wash of Burnt Umber to pick out the details and also some pigment treatment to the lower hull and running gear.
-
- Posts: 1245
- Joined: Wed Sep 28, 2022 10:18 pm
Completion 03-13-2010
Work continued on the weathering from last weekend with the application of a pin wash of enamel Burnt Umber to bring out all the detail. I applied the pin wash using a 10/0 brush and then after the wash had dried went back over it and removed any excess using the same brush and clean thinner.
The final missing detail was the antenna for the standard radio in the front hull, so I added that using a brass antenna from JB Models installed with CA gel. I painted the antenna with non-buffing Metalizer Gunmetal and then applied a dull coat to the entire model using Testors Lusterless Flat in the spray can.
The pigment treatment for the lower hull and tracks was next. To achieve this, I mixed up a roughly 50-50 combination of Mig Europe Dust and Dark Mud pigments as a dry powder in an old prescription bottle lid. Once combined, I added water with a drop of dish-washing soap to break the surface tension and applied it as a wet mixture using a round sable brush. This was allowed to air dry before moving on to the next step.
Wearing a dust mask to avoid inhaling the fine pigment dust, I set to work removing the excess pigment using a series of stiff bristled brushes. This was followed up with both wet and dry q-tips to further remove and adjust the pigments until I had the look I wanted.
Then it was off to the photo booth for the finished walk-around shots. I reset the white balance and made some minor adjustments here and there that the photos revealed.
This one ended up taking longer than I anticipated to complete at right about 2 months worth of effort but was a fun build from start to finish.